- 博客/
Docker-Compose 部署 Nexus3 Docker 私服,配置使用 Traefik 进行代理管理
Table of Contents
环境说明#
软件版本说明#
- 操作系统:
CentOS 7.9.2009 - Docker version:
20.10.7 - Docker-compsoe version:
1.18.0 - Mkcert version:
v1.4.3
端口使用规划#
nexus 私服端口 使用规划#
| 私服名称 | 私服作用 | 私服类型 | 私服端口 |
|---|---|---|---|
| docker-custom | 存放,自定义 push的 镜像,与项目环境无关 | hostd | 8086 |
| idocker.io | 代理仓库 & custom 仓库的集合 | group | 8082 |
| docker-dev | 存放与项目dev环境镜像 | hostd | 8083 |
| docker-qa | 存放与项目qa环境镜像 | hostd | 8084 |
| docker-prod | 存放与项目prod环境镜像 | hostd | 8085 |
除了上面 docker 私服使用端口外,还有 neuxs3 manage dashboard
8081端口
docker 代理仓库列表#
| 名称 | 私服类型 | 说明 | 地址 |
|---|---|---|---|
| docker-google | proxy | google 公开镜像 (需扶墙) | https://gcr.io |
| docker-k8s | proxy | kubernetes 的官方 google 镜像源(需扶墙) | https://k8s.gcr.io |
| docker-aliyun | proxy | aliyun 同步 docker 官方源 (存在部分镜像未同步问题) | https://7bezldxe.mirror.aliyuncs.com |
| docker-official | proxy | dockerhub 官方镜像地址(限制带宽,触发条件:匿名用户100次,认证用户200次) | https://registry-1.docker.io |
traefik ingress 端口 使用规划#
| ingress 名称 | ingress 作用 | ingress 端口 |
|---|---|---|
| http | http 站点入口 | 80 |
| https | https tls 证书 站点入口 | 443 |
私服 & traefik 使用 dokcerc-compsoe 一键部署安装#
此次,部署文档所依赖工具和对应配置文件已整理至此
Github仓库中,文档中所示步骤均已在Centos7系统中做了验证且通过。其他平台及架构只需替换为相应软件包的版即可解决,验证待 自行确定。
docker-compose 的安装和准备工作#
yum install -y docker-compose # centos 下直接使用 yum
git clone 代码#
git clone https://github.com/cdryzun/traefik-nexus.git
生成证书#
在使用 mkcert 生成证书时,这里有一个问题需要注意一下。生成指定的
cert-file&key-file文件名称是有讲究的,如为域名:example.io生成证书文件,其文件前缀的取名应该为example-io,否者将导致 traefik 在引用证书时匹配不上,故而将其使用到了默认证书。
mkcert 版本列表 查看。
cd traefik-nexus

chmod a+x ./mkcert # linux amd64 架构,确认与操作系统架构相同

./mkcert --version
v1.4.3

mkdir -p certs # 创建存放证书文件夹

./mkcert -ecdsa -cert-file certs/treesir-pub.crt -key-file certs/treesir-pub.key "treesir.pub" "*.treesir.pub" "treesir.lan" "*.treesir.lan" # 生成域名证书

./mkcert -ecdsa -cert-file certs/idocker-io.crt -key-file certs/idocker-io.key "idocker.io" "*.idocker.io" "idocker.lan" "*.idocker.lan" # 生成 docker 私服使用证书

ls certs/  # 确认证书是否存在
idocker-io.crt  idocker-io.key  treesir-pub.crt  treesir-pub.key
生成完证书后,注意检查确认一下 traefik/traefik.yml 中配置文件的配置是否对应
cat traefik/traefik.yml
...
tls:
  certificates: # 将生成的证书 加到 traefik tls 证书池,自动匹配
    - certFile: /certs/treesir-pub.crt
      keyFile: /certs/treesir-pub.key
  certificates:
    - certFile: /certs/idocker-io.crt
      keyFile: /certs/idocker-io.key
  options:
    default:
      minVersion: VersionTLS12
      cipherSuites:
        - TLS_ECDHE_RSA_WITH_AES_128_GCM_SHA256
        - TLS_RSA_WITH_AES_256_GCM_SHA384
  stores: # 配置默认证书
    default:
      defaultCertificate:
        certFile: /certs/treesir-pub.crt
        keyFile: /certs/treesir-pub.key
...
检查确认 docker-compose 部署文件#
cat docker-compose.yml
version: "3"
services:
  traefik:
    restart: always
    image: traefik:v2.4.8
    container_name: traefik
    ports:
      - "80:80"
      - "443:443"
    volumes:
      - /var/run/docker.sock:/var/run/docker.sock:ro
      - ./certs:/certs:ro
      - ./traefik/traefik.yml:/traefik.yml:ro
    labels:
      - traefik.enable=true
      - traefik.http.routers.traefik.entrypoints=http,https
      - traefik.http.routers.traefik.rule=Host(`traefik.treesir.pub`)  # traefik dashboard 关联域名
      - traefik.http.routers.traefik.tls=true
      - traefik.http.routers.traefik.service=api@internal
  nexus:
    restart: always
    image: sonatype/nexus3:3.30.1
    container_name: nexus3
    privileged: true
    environment:
      - INSTALL4J_ADD_VM_PARAMS=-Xms4g -Xmx4g -XX:MaxDirectMemorySize=6g # jvm 参数 对标 8g 内存机器,按比例 & 实际需求调整
    volumes:
      - /etc/localtime:/etc/localtime:ro
      - ./nexus-data:/nexus-data
    labels:
      - traefik.enable=true
      - traefik.http.routers.1.entrypoints=http,https
      - traefik.http.routers.1.rule=Host(`mirror.treesir.pub`) && PathPrefix(`/`)
      - traefik.http.routers.1.tls=true
      - traefik.http.routers.1.service=one
      - traefik.http.services.one.loadbalancer.server.port=8081
      - traefik.http.routers.2.entrypoints=http,https
      - traefik.http.routers.2.rule=Host(`idocker.io`) || (Host(`idocker.io`) && Method(`GET`))
      - traefik.http.routers.2.tls=true
      - traefik.http.routers.2.service=two
      - traefik.http.services.two.loadbalancer.server.port=8082
      - traefik.http.routers.3.entrypoints=http,https
      - traefik.http.routers.3.rule=(Host(`idocker.io`) && Path(`/v1/search`)) || (Host(`idocker.io`) && Method(`PUT`,`HEAD`,`POST`,`PATCH`))
      - traefik.http.routers.3.priority=100
      - traefik.http.routers.3.tls=true
      - traefik.http.routers.3.service=three
      - traefik.http.services.three.loadbalancer.server.port=8086
      - traefik.http.routers.4.rule=Host(`dev.idocker.io`) && PathPrefix(`/`)
      - traefik.http.routers.4.tls=true
      - traefik.http.routers.4.service=four
      - traefik.http.services.four.loadbalancer.server.port=8083
      - traefik.http.routers.5.rule=Host(`qa.idocker.io`) && PathPrefix(`/`)
      - traefik.http.routers.5.tls=true
      - traefik.http.routers.5.service=five
      - traefik.http.services.five.loadbalancer.server.port=8084
      - traefik.http.routers.6.rule=Host(`prod.idocker.io`) && PathPrefix(`/`)
      - traefik.http.routers.6.tls=true
      - traefik.http.routers.6.service=six
      - traefik.http.services.six.loadbalancer.server.port=8085
networks:
  default:
    external:
      name: docker
执行启动 & 导入 ca 证书的验证#
docker-compsoe 执行启动#
mkdir -p ./nexus-data # 创建 nexus 数据存储目录,开放权限,防止报错
chmod 777 -R ./nexus-data

docker network create docker  # 创建网络


docker-compose up -d  # 启动

docker-compose logs -f  # 检查日志,确认有无错误
添加 hosts 记录#
sudo -- sh -c "echo '192.168.8.88 idocker.io dev.idocker.io qa.idocker.io prod.idocker.io mirror.treesir.pub traefik.treesir.pub' >> /etc/hosts" # macos
导入 ca 证书,添加信任#
yum install -y lrzsz

sz -y $(mkcert -CAROOT)/rootCA.pem
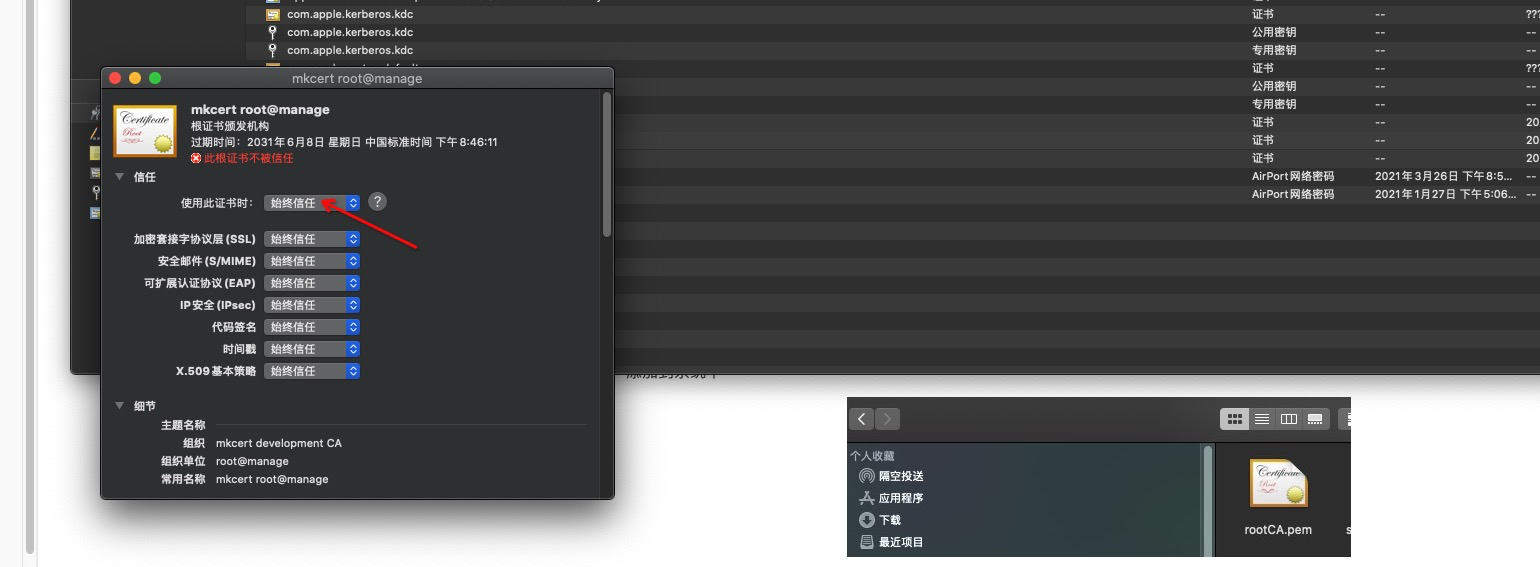
双击此证书,添加到系统中

双击打开,设置永远信任


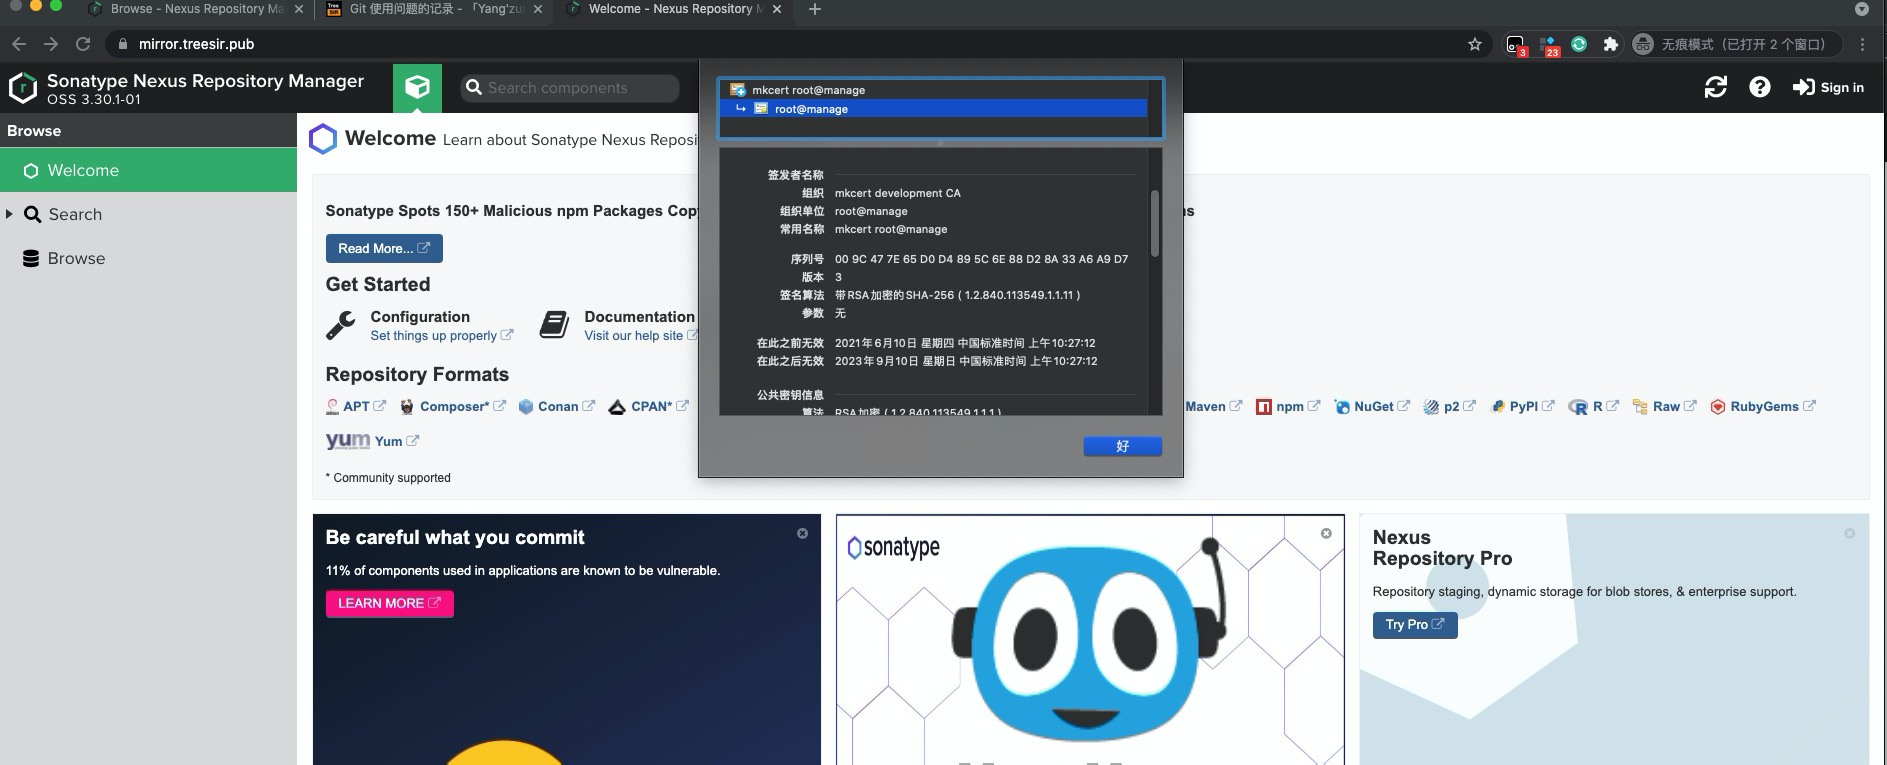
测试访问一下 nexus dashboard manage

nexus dashboard manage 初始化 admin 密码查看
docker exec nexus3 bash -c "cat /nexus-data/admin.password"
docker 私服 测试使用#
在测试之前,请检查一下是否创建了对应的 docker 私服仓库,且对应的端口已正常在监听。由于此部分之前有过相关的整理,故作省略,参考步骤 文档。
检查配置#
且创建
idocker.io可供测试使用的列表做测试试验

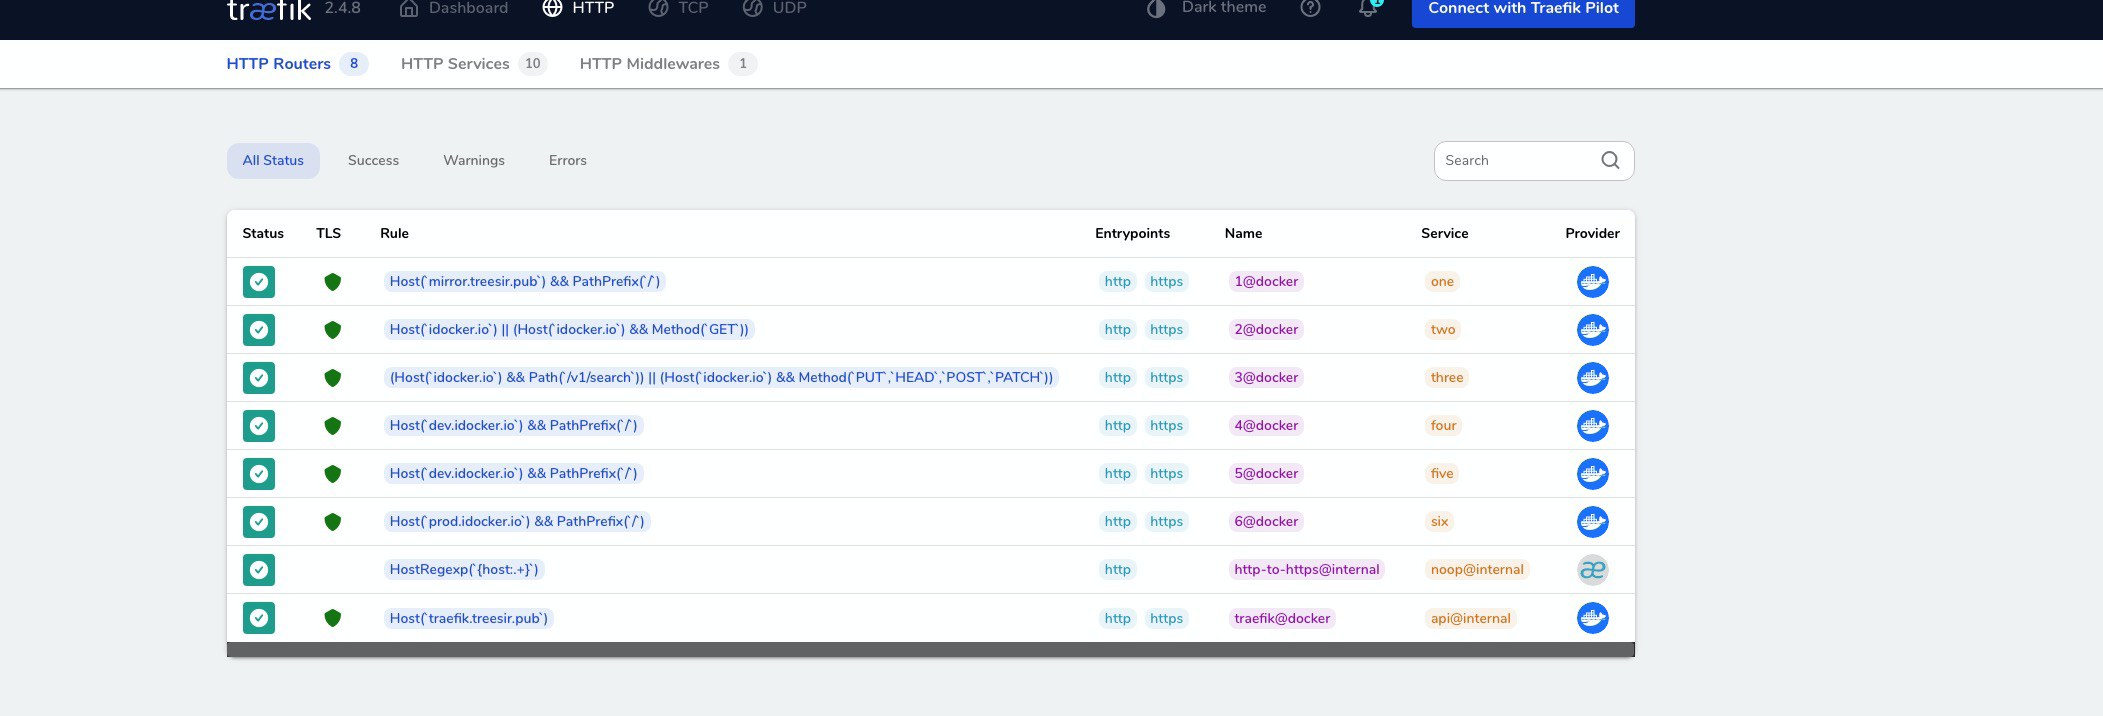
traefik 中配置检查

信任 docker 私服#
cat /etc/docker/daemon.json
{
...
    "insecure-registries": ["idocker.io"]
...
}

docker login idocker.io

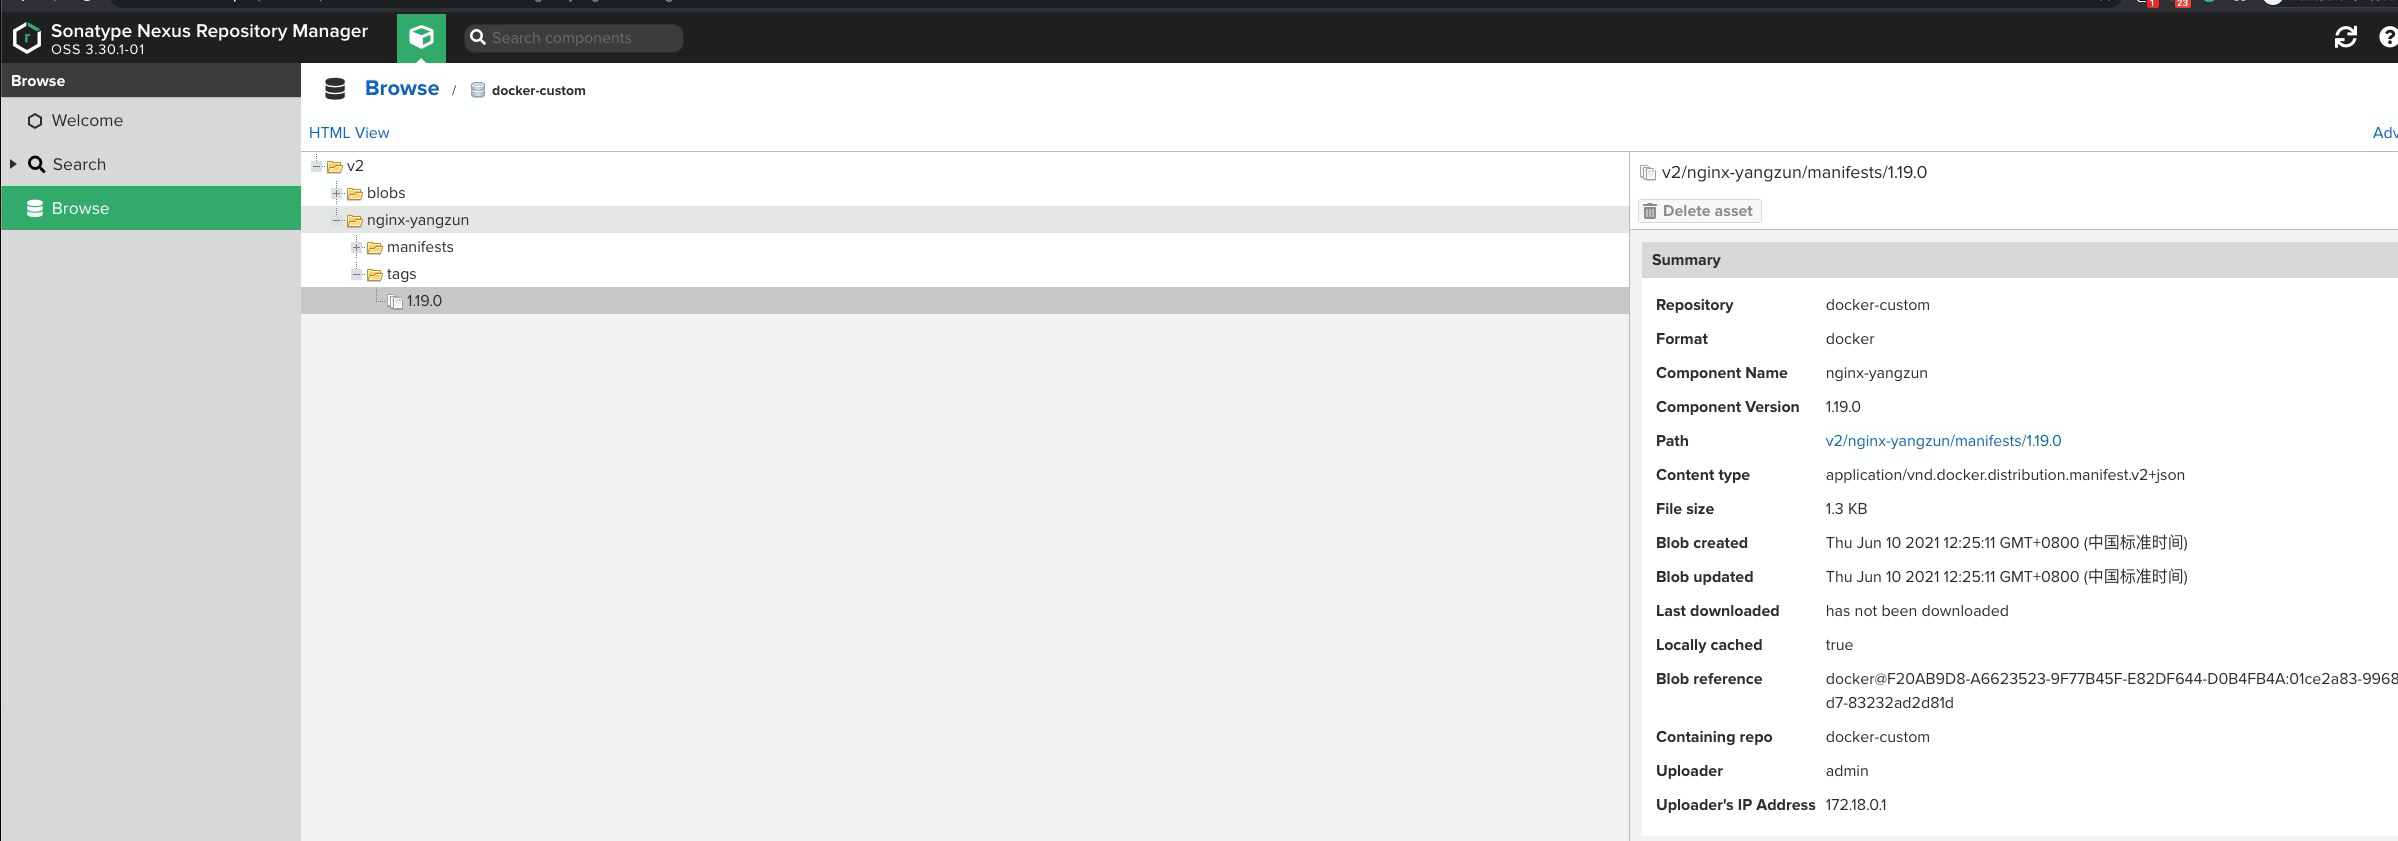
查看私服镜像情况#
idocker.io group 私服

docker-custom hostd 私服

参考文档#
https://doc.traefik.io/traefik/migration/v1-to-v2/
https://shanyue.tech/op/traefik.html#%E5%BF%AB%E9%80%9F%E5%BC%80%E5%A7%8B
https://doc.traefik.io/traefik/user-guides/docker-compose/acme-tls/
https://github.com/SushiFu/traefik-local
